"So...I want power steering to my Monster Miata. Do I use a Ford Power steering pump or somehow adapt the Mazda one?"

This question comes up fairly often. There are advantages and disadvantages to each approach but the Mazda pump usually wins out due it's lighter weight, it's compatibility with the existing Miata steering rack and the fact that most people would rather deal with modifying a bracket rather than a power steering hose. The decision basically comes down to which you'd rather deal with...plumbing or fabrication.
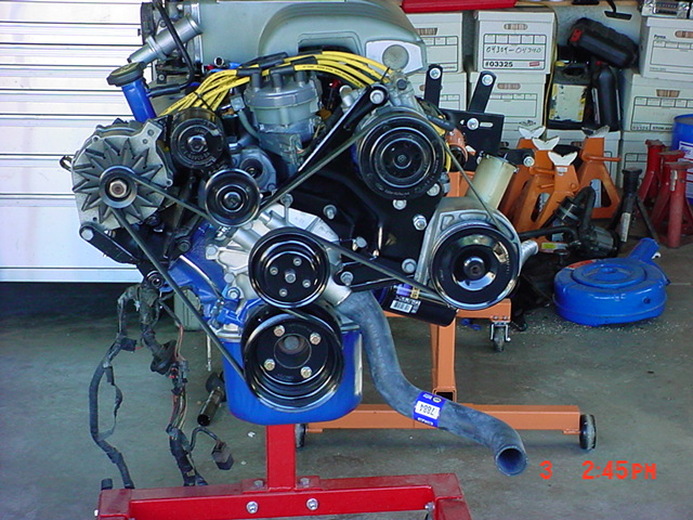
First let's look at option # one: using the Ford pump. Above is a 1987-93 Ford Mustang 5.0 wearing it's "stock" belt configuration and Ford power steering pump. It is possible to use this exact set up in a converted Miata although doing so will entail "notching" the driver's side frame where the PS pump protrudes and making up two custom hoses to mate the pump with Mazda steering rack. While both of these are both not out of the realm of possibility for the average builder I've always felt using the Mazda pump was a more attractive option. I'll explain why below:
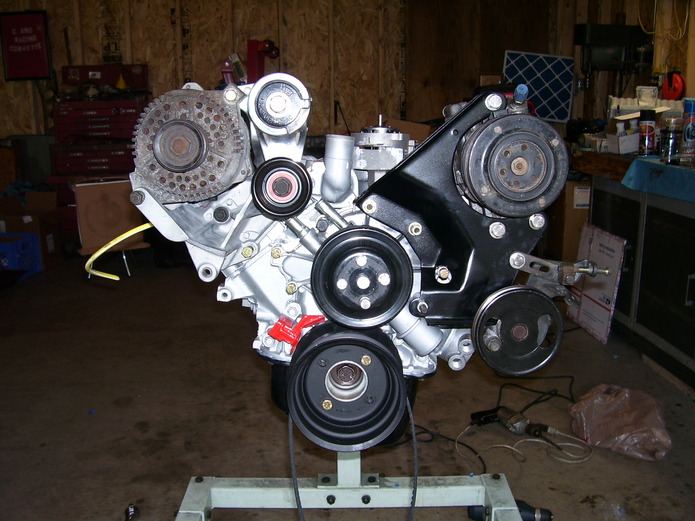
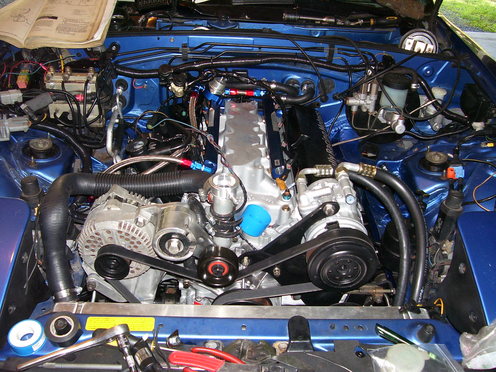
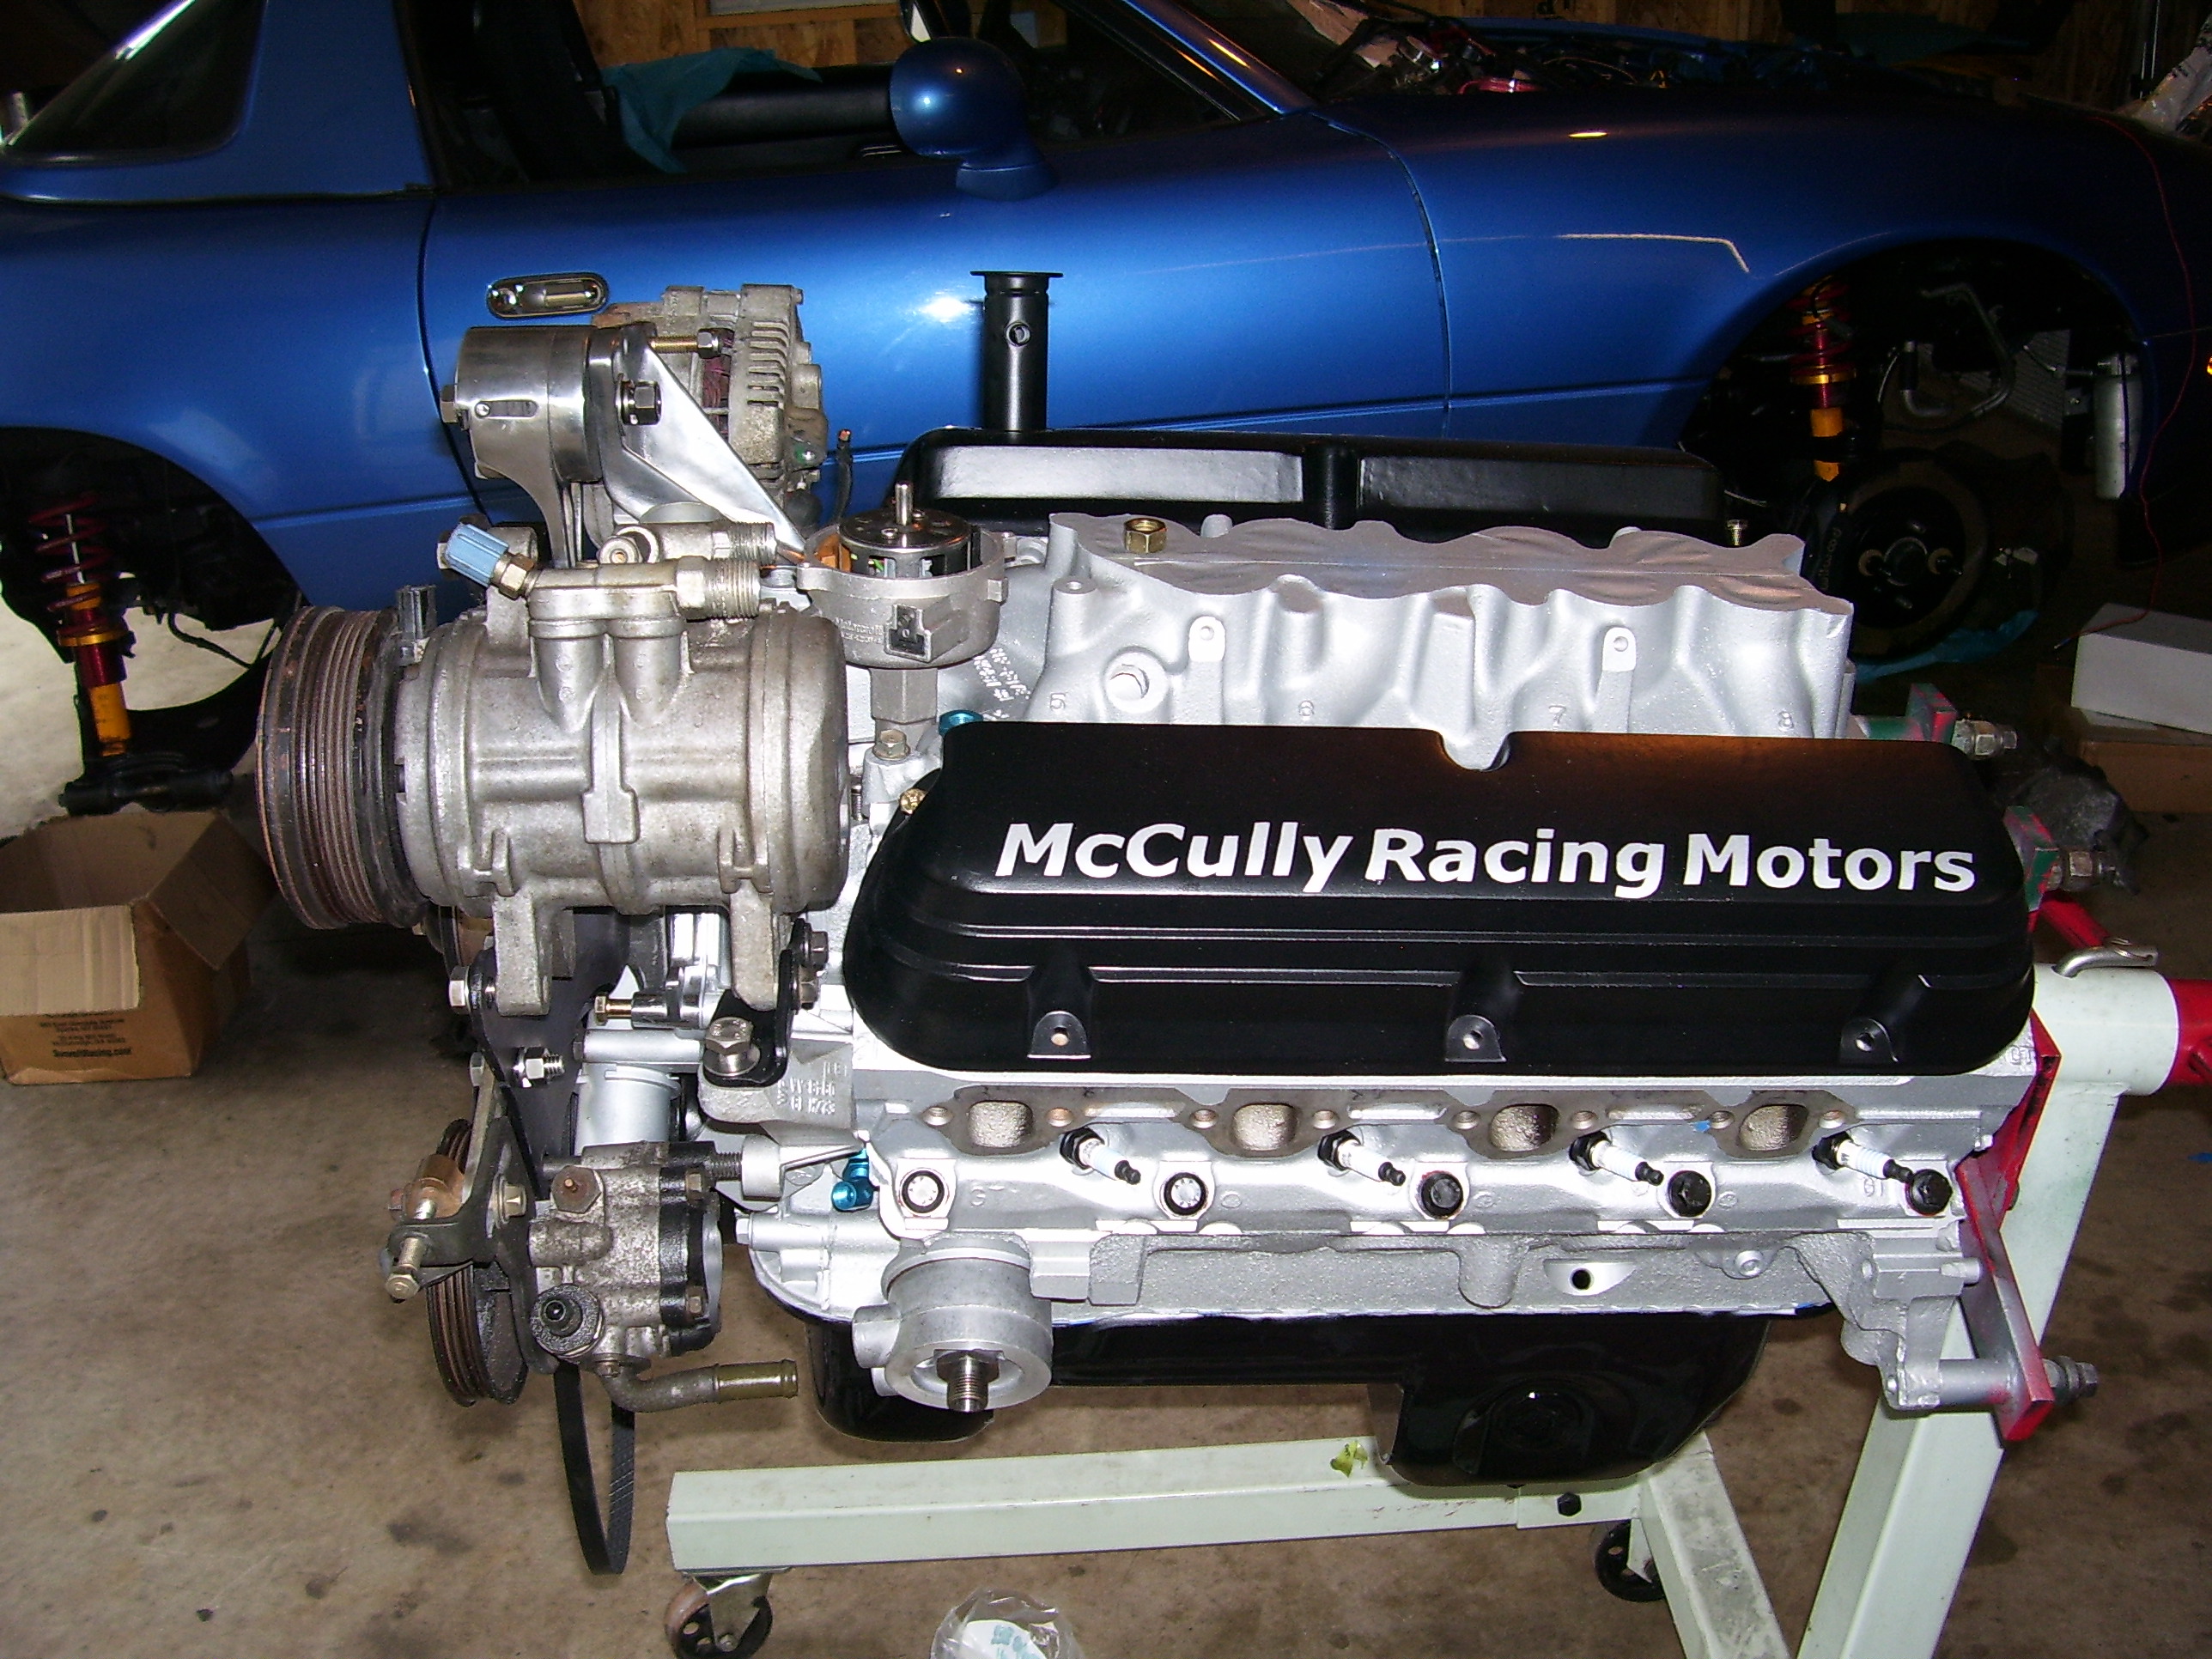
This is the engine currently in my blue Laguna during it's mock up. On this and the car before it I used the Mazda power steering pump as can be seen above. The obvious first advantages over the Ford unit is the size and location. While the Ford unit is about the size of a melon, the Mazda unit is only about the size of a fist. It's smaller size and remote reservoir bottle allows it to be tucked nicely inboard clearing the frame rails (no need to cut and weld). Because it is matched to the Mazda rack you can get away with using the stock lines without modification (you can even leave them hooked up to the rack during the conversion if you are careful) and it will never overpower the rack with too much pressure. From a purely cosmetic point of view I tend to think it's a little less ugly than the Ford unit as well. As you can see in the installed pictures above it's barely visible in the completed engine bay:
There are no modifications needed to the Ford PS/AC bracket to make the above work. The power steering pump and Mazda tentioning bracket almost magically mount up to the same two holes in the Mustang AC/PS bracket that the original Ford pump used. With the addition of a small spacer (I use an old Mazda seat belt tower spacer - if you installed a roll bar in your Miata you'll have four of them lying around - a set of washers or even a small section of pipe would work fine as well) you can pass the main power steering bolt through the hole mounted behind the pump's pulley (the one you need to orient the pulley correctly to access), through the Ford PS/AC bracket's lower PS mounting hole and right into the small aluminum AC/PS bracket on the driver's side head. The Mazda tentioning assembly bolts to the upper Ford mounting hole with a generic bolt and nut. Slightly grinding the end of the Mazda tension arm will allow the pump to be pulled in even closer but is not completely necessary. There is also a bracket spot welded to the Mazda tension arm that is no longer needed. I usually take ts off with a grinder to make things look cleaner but again this is not completely necessary.
"Um, I think we have a problem..."
If you've looked at a Miata pump next to the Ford parts you've probably realized by this point that while the Mazda pump uses a four-rib serpentine belt the Ford belt is six-rib. Unfortunately this is really the only "difficult" aspect of using the Mazda pump as compared to the Ford unit. To make it work you'll have to run a second belt (a 35.5" 4-rib belt) behind the Ford's serpentine belt. To power it you'll have to modify the Ford's crank pulley by adding a second 4-rib sheave (the part of a pulley the belt contacts) behind the existing 6-rib sheave. Fortunately luck would have it when you cut out the center of it a 1994+ Miata water pump pulley has exactly the right internal diameter to slip right over the back portion of a 1987-1993 Ford Mustang crank pulley where it can be carefully tack-welded in place.
Since most builders do not have the equipment to handle this type of job its recomended that you take your Ford crank pulley and 1994+ Mazda water pump pulley (note that 1990-93 ones are designed for a v-belt and will not work...sorry) to a machinist and have the lathe and welding work done. If you don't have a local machinist who can do the work McCully Racing Motors can get the pulley done for you even if you do not have one or both of the needed core pulleys.
Below are a few images of the completed assembly. Click on any one of them to open them up in a bigger window:

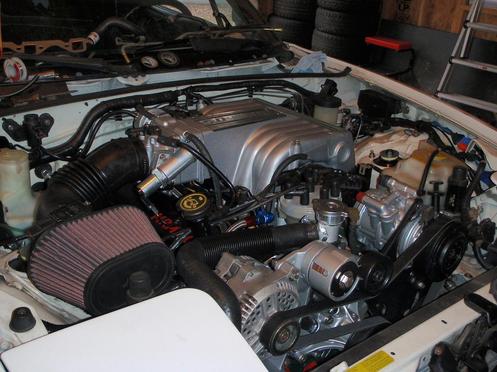
Here we can see the Mazda tension and mounting unit from above. Note that the power steering reservoir will need to be moved back a few inches to clear the adjuster arm. The body-mounted tab a couple inches in front of the reservoir was the original mounting point.

A closer look at the Mazda tension arm/PS mount bolted to the Mustang AC/PS bracket. The only modification to what you see below was to grind down the inboard end of the rear portion of the tension unit to allow it to move closer to the Ford bracket during belt mounting. The two bolts that are part of the tension mechanism are original Mazda bolts while everything else in the picture is aftermarket stainless.

Here we can see the modified pulley from below. It's amazing how well everything lines up. While not directly related to this project, its worth noting that I typically remove the Mazda power steering cooling loop from the system to make more room for the radiator. To eliminate the loop I cut the lower PS hose (return, not pressure) into a "u" shape and run it directly from the pump to the reservoir. The hose attached to the pump with two hose clamps is this hose.
A final image of the pump form the side during mock-up. If you look closely you can see the spacer used in front of the pump (a seat belt spacer) and the threaded area of the bolt threaded into the Ford aluminum rear AC bracket. Note that another small spacer is used here when actually installed.
I hope you've enjoyed this write-up. If you have any questions please feel free to post your question here, at the V8Miata Forum or via email at [email protected].
-Jason
-Jason
 RSS Feed